11 Best Weekend DIY Projects for Beginners That Actually Look Good
Last Saturday, I was staring at a blank wall in my living room, scrolling through Instagram for the hundredth time. Every “beginner DIY” I tried before ended up looking like a craft fair reject—wobbly shelves, drippy paint, and fabric that frayed before I even took a photo. Then I built a floating shelf from a single pine board in under two hours, stained it walnut, and my neighbor asked if I’d hired someone. That shelf is the reason I’m writing this list.
Here are 11 weekend projects that deliver professional-looking results without requiring a workshop full of tools or a decade of experience. Each one I’ve built, tested, or messed up myself, and I’ll tell you exactly what went wrong so you can skip the same mistakes.
Why These 11 Weekend DIY Projects Actually Look Professional
The secret isn’t skill—it’s picking projects designed for clean lines and forgiving materials. Every project here hides small imperfections naturally. Wood grain covers sanding scratches. Concrete patina makes cracks look intentional. Fabric wraps cover uneven cuts.
When I started, I thought I needed expensive tools and perfect technique. What I actually needed was projects that work with beginner mistakes, not against them. These 11 projects are curated for that exact purpose.
Project 1: Floating Accent Shelves (Under 2 Hours)
This is the project that changed my DIY confidence. You need one 2x8 pine board, a bracket kit (buy one with hidden supports), wood stain of your choice, a drill, a level, and a stud finder. Total cost: about $20.
Steps:
1. Cut your board to length—24 inches is standard for a small shelf. Sand the edges with 120-grit paper until smooth.
2. Stain or paint your board. I used Minwax Dark Walnut stain applied with a rag, then wiped off after 5 minutes. Two coats gives a rich color.
3. Mount the bracket to the wall according to the kit instructions. Use a level—this is where most beginners mess up. I once installed a shelf with a 1-inch tilt and had to patch three drywall holes.
4. Slide the shelf onto the bracket. Done.
Styling tip: Place one small plant and one book on each shelf. More than two items looks cluttered. Trust me, I learned the hard way.
Project 2: Modern Wooden Wall Organizer (Hooks + Mail Station)
This solves the entryway clutter problem in one afternoon. Buy a 1x6 pine board (36 inches long), four cup hooks, and a small shelf bracket. Cut the board to 36 inches, sand it smooth, and paint it matte black or white.
Drill pilot holes for the hooks at 6-inch intervals. Mount the board horizontally on your wall at eye level. Use the shelf bracket to add a small shelf above for mail or keys. The whole thing cost me $15 and took 3 hours.
Real example: My friend Sara built this in her tiny apartment entryway. She used a dark blue paint and gold hooks. Now her keys and mail have a home, and guests compliment the “designer” look.
Project 3: Geometric Painted Accent Wall (No Tape Needed)
Painting a geometric accent wall sounds intimidating until you realize you don’t need tape at all. Tape always bleeds anyway. Instead, use a freehand technique with a small artist brush and a steady hand.
Choose two complementary paint colors—I used a warm gray base and a deep teal for the shapes. Draw your shapes lightly with a pencil and a level. Paint inside the lines with a 1-inch brush, keeping a wet edge to avoid lap marks. If you mess up, just wait for it to dry and paint over it with the base color.
Counter-intuitive insight: Imperfect edges actually look better than perfect straight lines in geometric patterns. They give it a handcrafted, modern feel. I deliberately left a few wobbly lines on my wall, and everyone thinks it’s intentional.
Project 4: Upcycled Crate Side Table (Under $10)
Wooden crates are everywhere—grocery stores give them away, and online marketplaces sell them for $5. Find one with sturdy sides and no broken slats. Sand it down with 80-grit then 120-grit paper until smooth.
Paint or stain it. I used a matte white chalk paint, then lightly sanded the edges for a distressed look. Add four furniture legs from Amazon ($8 for a set of four) screwed into the bottom corners. Now you have a side table that looks like it cost $150 from West Elm.
My mistake: I forgot to pre-drill holes for the legs and split the wood on my first attempt. Always pre-drill with a bit slightly smaller than your screw.
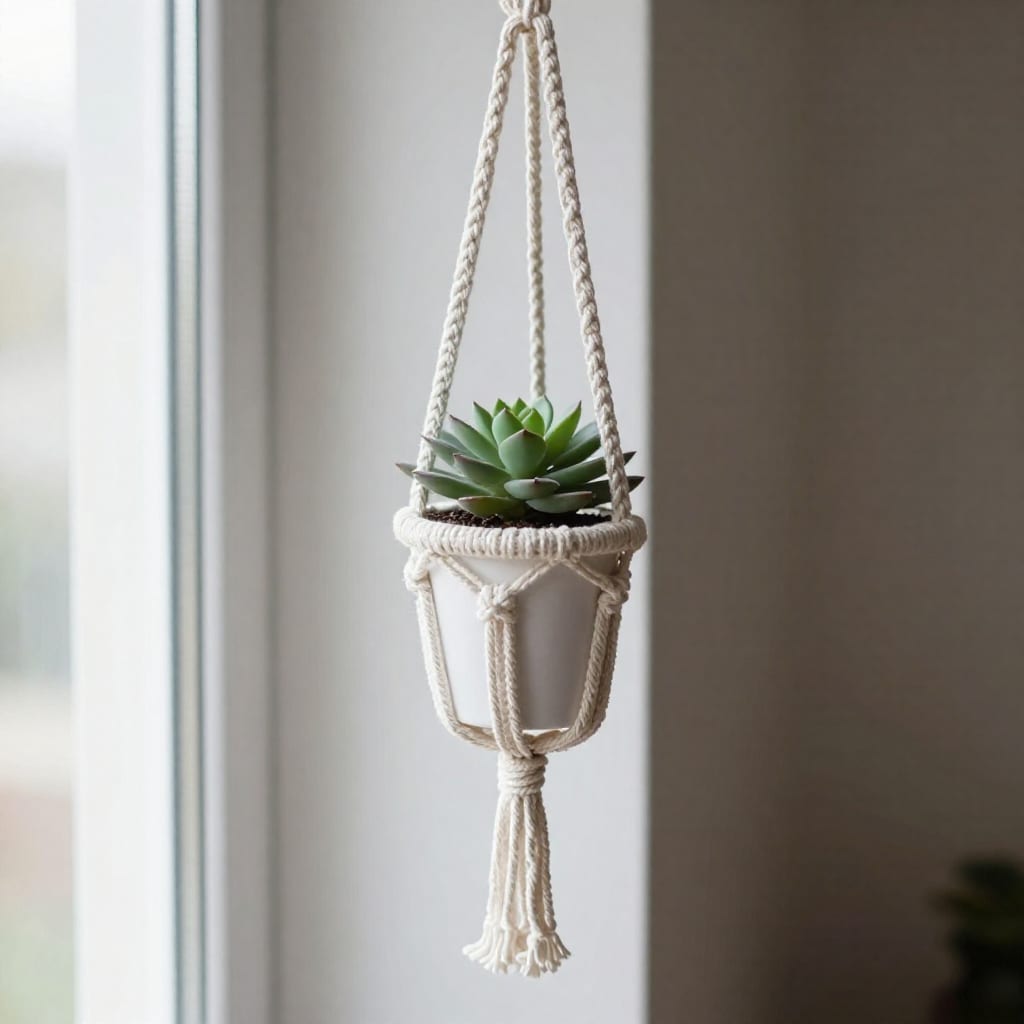
Project 5: Easy Macrame Plant Hanger (No Knotting Experience Needed)
Macrame looks complex, but the basic knot is just a square knot repeated. Buy a 3mm cotton rope (about 20 yards for one hanger) and a wooden ring. Watch one 2-minute YouTube tutorial on square knots.
Cut eight strands of rope, each 8 feet long. Fold them in half over the ring. Tie square knots in pairs until you reach your desired length—about 12 inches for a hanging pot. The forgiving part: if you tie a knot wrong, just pull it out and retie. I redid my first hanger three times before it looked right.
Pro tip: Spray the finished hanger with water and hang it with a weight to stretch the knots evenly. Let it dry overnight for a professional drape.
Project 6: Concrete Minimalist Planter (Mold-Free Method)
Concrete planters are trendy but notoriously tricky—they crack, stick to molds, and crumble. The foolproof method uses plastic containers as molds (like yogurt cups or takeout containers). Use a 3:1 ratio of concrete mix to water, mixed to a thick pancake batter consistency.
Spray the inside of your mold with cooking spray before pouring. Insert a smaller cup for the center hole, weighted down with a rock. Let it cure for 48 hours—don’t rush this. Then gently peel away the plastic mold. If it’s stuck, soak it in warm water for 10 minutes.
My first attempt: I used a glass bowl as a mold and ended up with a shattered bowl and a lump of concrete. Plastic molds are non-negotiable for beginners.
Project 7: No-Sew Throw Pillow Covers (Instant Room Refresh)
No sewing machine? No problem. Buy fabric (cotton or linen, 1 yard per two pillows), iron-on hem tape, and a pair of sharp scissors. Cut two rectangles of fabric 2 inches larger than your pillow insert on each side.
Fold the edges over by 1 inch, place a strip of hem tape inside, and iron on high heat for 10 seconds per side. Leave one edge open, insert the pillow, then iron the final seam shut. The tape holds through washing as long as you don’t use high heat in the dryer.
Styling tip: Use a textured fabric like linen or velvet for an expensive look. Plain cotton looks cheap unless you add a fringe trim (also attached with fabric glue).
Project 8: Hanging Herb Garden (Vertical Space Saver)
This combines gardening with a simple woodworking project. Buy a 1x4 pine board cut to 24 inches, four small terracotta pots (3-inch diameter), and rope or chain. Drill drainage holes in the pots if they don’t have them. Attach the pots to the board using small metal brackets or by threading rope through a hole in the bottom of each pot.
Mount the board on a wall near a kitchen window. Plant basil, mint, and chives—they grow fast and forgive overwatering. My herb garden cost $18 and provides fresh basil for pasta every week.
Critical detail: Use a waterproof backing or seal the wood with polyurethane. Water will splash, and untreated wood will rot in months.
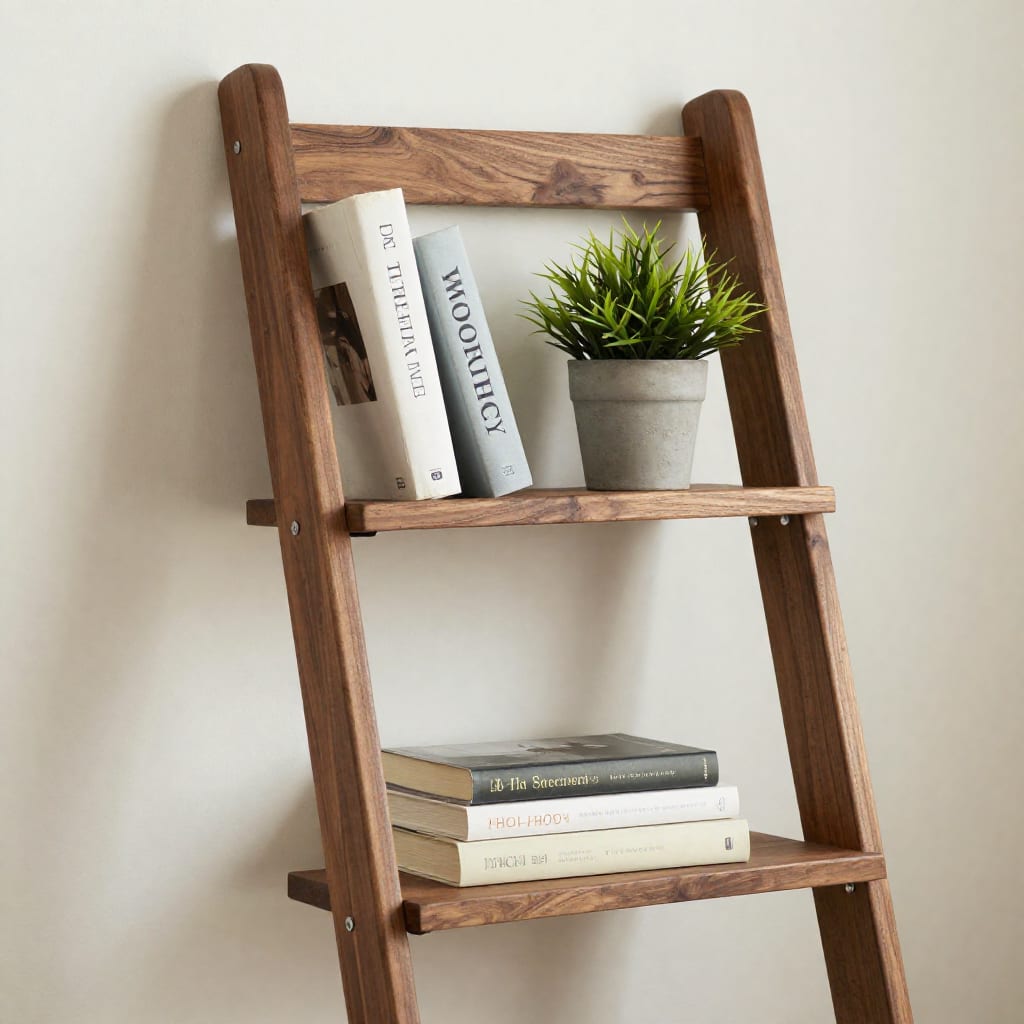
Project 9: Ladder Shelf (Repurposed from Old Ladder)
Thrift stores have old wooden ladders for $10-$20. Look for one with straight rungs and no rot. Sand the entire thing with 100-grit paper, then stain or paint it. Lean it against a wall at a 15-degree angle. Use small shelf brackets or wooden dowels to add shelves between the rungs if you want more storage.
I found a 6-foot ladder at a garage sale for $5. After sanding and staining it dark walnut, it became a leaning bookshelf in my reading nook. The rustic look hides any uneven sanding—a perfect beginner project.
Safety note: Secure the top of the ladder to the wall with a small bracket or a wire anchor if you have kids or pets. A leaning ladder can tip if bumped.
Project 10: DIY Cork Board with Fabric Frame (Customizable)
Buy a 24x36 inch cork board from a craft store ($12). Cut fabric 2 inches larger on each side—I used a mustard yellow linen. Lay the fabric face down, place the cork board on top, and wrap the edges tight. Use a staple gun to secure the fabric to the back of the board, pulling taut as you go.
Add a wooden frame by cutting four pieces of 1x2 pine, mitering the corners (or just butt-jointing them for simplicity). Paint or stain the frame, then attach it to the cork board with wood glue. Total cost: about $25, and it looks like a custom piece from a boutique.
Pro tip: Use a staple gun with narrow crown staples. I used wide staples on my first attempt, and they showed through the fabric. Narrow staples disappear into the board.
Project 11: Painted Terra Cotta Pot Set (Colorful Plant Upgrade)
The simplest project on the list, and one of the most satisfying. Buy a set of terra cotta pots (3 for $10 at any garden center). Clean them with a damp cloth to remove dust. Use acrylic paint pens or spray paint to add designs.
For a modern look, paint the bottom two-thirds of the pot in a single color and leave the top rim natural. Or use a paint pen to draw simple geometric lines. I painted a set with matte black bottoms and gold rims using a paint pen. They sit on my kitchen windowsill and get compliments every time someone visits.
My advice: Use a clear acrylic sealer spray afterward if the pots will be outside. Rain will wash off plain acrylic paint in a few weeks.
Pro Tips for Making Any Beginner Project Look High-End
Here are the universal finishing tricks I learned the hard way:
- Sand everything. Even if you think it’s smooth, sand it with 120-grit paper. Rough edges scream “beginner.”
- Use primer. Paint adheres better and covers in fewer coats. One coat of primer saves you two coats of paint.
- Buy good hardware. Cheap black screws rust and look ugly. Use stainless steel or brass screws, or cover them with wood plugs.
- Style sparingly. Three items arranged in odd numbers (1, 3, 5) look curated. A row of identical items looks like a store display.
- Match your finishes. If your room has brushed nickel handles, don’t use gold hooks. Consistent hardware makes a room look designed.
One more thing worth bookmarking before your next project: always test stain or paint on a scrap piece of wood first. The color on the can never matches reality. I once stained an entire bookcase with “espresso” that turned out purple. Don’t be me.
Frequently Asked Questions
Do I need a lot of tools for these weekend DIY projects?
Most require only a drill, measuring tape, sandpaper, and basic hand tools. We list exact tool needs for each project above. The most expensive tool you’ll likely need is a drill, which you can borrow from a friend or rent from a hardware store.
How long does each project actually take?
Each is designed for a single weekend day (2-6 hours). Drying times for paint or glue may extend to overnight. Plan to start in the morning and finish by late afternoon, letting things dry while you relax.
Can I complete these projects in an apartment?
Yes—none require large workbenches or saws. Use a drop cloth on a balcony or kitchen counter. Most cutting can be done by a hardware store employee for free if you don’t have a saw.
What if I mess up—can I fix mistakes easily?
All projects use forgiving materials. Wood can be sanded, paint can be covered, and concrete can be patched with a thin layer of fresh mix. The macrame and fabric projects can be undone and redone without waste.
Will these projects actually look good in a modern home?
Yes—each was selected for clean lines, neutral finishes, and timeless appeal. The styling tips included above help you avoid the “handmade” look and achieve a “curated” aesthetic.
Final takeaway: Start with the floating shelf (Project 1) or the painted terra cotta pots (Project 11). They take the least time and give you the biggest confidence boost. Once you see how good a simple project can look, you’ll be hooked. I was.